How to Delete Recordings on Dish: A Step-by-Step Guide
Dish Network offers a vast array of features and services, including the ability to record your favorite TV shows and movies. However, as your recording list grows, you might find it necessary to delete certain recordings to free up space for new content. In this article, we will guide you through the process of deleting recordings on Dish, providing step-by-step instructions to help you optimize your TV viewing experience.
1. Accessing the DVR Menu
To begin the process of deleting recordings on Dish, you need to access the DVR menu on your receiver.
Using your Dish remote control, press the "DVR" button, which will direct you to the list of recorded programs.
2. Navigating the Recorded Programs List
Once you are on the recorded programs list, you can use the arrow keys on your remote control to navigate through the recordings.
Take your time to browse through the list and identify the recordings you wish to delete.

how to delete recordings on dish
3. Selecting the Recording
To delete a specific recording, highlight it on the list by navigating to it using the arrow keys.
Once the desired recording is highlighted, press the "OK" or "Select" button on your remote to access the options for that recording.
4. Accessing the Recording Options
After selecting a recording, a new menu will appear, presenting various options related to that particular recording. Look for the option that allows you to delete the recording.
The exact wording may vary depending on your Dish receiver model, but it is usually labeled as "Delete," "Erase," or "Remove."
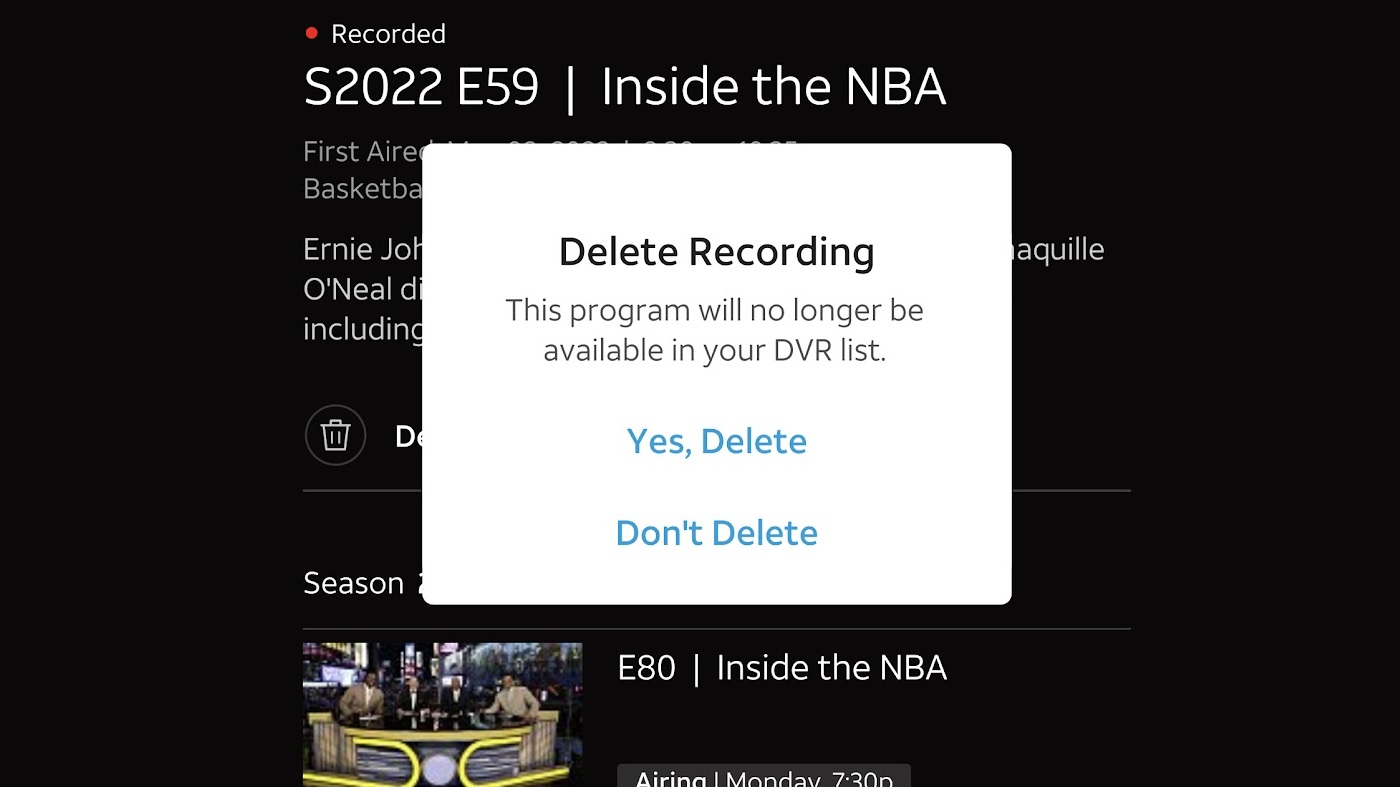
5. Confirming the Deletion
Once you have found the delete option, press the "OK" or "Select" button again to confirm the deletion. A confirmation prompt will appear, asking you to confirm your decision to delete the recording.
how to delete recordings on dish
Select "Yes" or "Delete" to proceed with the deletion.
6. Deleting Multiple Recordings
If you want to delete multiple recordings at once, you can use the "Multi-Delete" feature on Dish. To do this, navigate to the first recording you want to delete and press the "OK" or "Select" button.
Then, instead of selecting "Delete," choose the "Multi-Delete" option. Continue selecting the recordings you wish to delete by highlighting them and pressing "OK" or "Select."
Once you have made your selections, confirm the deletion as instructed earlier.
7. Recovering Deleted Recordings
In case you accidentally delete a recording, Dish provides a feature to recover deleted content. To access the "Deleted Items" menu, navigate to the DVR menu, and select the "Deleted Items" option.
Here, you can find a list of recently deleted recordings. Select the recording you want to recover and choose the "Restore" option. The recovered recording will then be restored to your recorded programs list.
8. Clearing All Recordings
If you wish to clear your entire list of recordings on Dish, you can do so using the "Clear All" option. Access the DVR menu and locate the "Clear All" or "Delete All" option, usually found in the settings or options menu.
Select this option and confirm your decision to delete all recordings. Keep in mind that this action is irreversible, and all your recorded content will be permanently deleted.
how to delete recordings on dish
9. Conclusion
Managing your recorded programs on Dish is essential for optimizing your TV viewing experience.
With the step-by-step guide provided in this article, you can confidently delete unwanted recordings, free up space, and ensure that your favorite shows and movies are always available.
Remember to navigate through the DVR menu, select the desired recording, access the recording options, and confirm the deletion. By following these instructions, you can easily delete recordings on Dish and maintain a well-organized DVR library.