Change Battle.net Profile Picture: A Step-by-Step Guide
Having a unique profile picture on Battle.net can enhance your gaming experience and make you stand out among other players. This comprehensive guide will walk you through the process of changing your Battle.net profile picture, step by step. By following these instructions, you'll be able to personalize your profile and showcase your individuality. Let's dive in!
1. Accessing the Battle.net Website:
Accessing the Battle.net Website
To begin, open your preferred web browser and navigate to the Battle.net website. Make sure you are logged in to your Battle.net account. If you don't have an account yet, you'll need to create one before proceeding.
2. Navigating to the Profile Page:
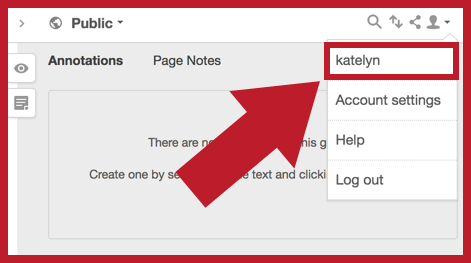
Navigating to the Profile Page
Once you're logged in, locate the user profile icon in the top-right corner of the website and click on it. This will open a dropdown menu. From the menu, select "Profile" to proceed to your profile page.
3. Finding the Profile Picture Section:
On your profile page, you'll find various sections where you can customize your account settings. Look for the section specifically labeled "Profile Picture" or something similar. It may be located in the "Account Settings" or "Profile Settings" area.
4. Choosing a New Picture:
Within the Profile Picture section, you'll have several options to change your current picture. You can either upload a new image from your computer or select one from the provided options. If you decide to upload an image, make sure it meets the specified requirements, such as file format and size.
5. Uploading an Image:
If you choose to upload an image, click on the "Upload" or "Choose File" button. This will open a file explorer window on your computer. Browse to the location where your desired image is saved, select it, and click "Open" or "Choose" to upload it to the Battle.net server.
6. Adjusting the Picture:
After uploading or selecting a new image, you may have the option to adjust it within the Battle.net platform. This could involve cropping, resizing, or applying filters to the image. Follow the on-screen instructions to make any necessary adjustments until you're satisfied with the result.
7. Saving the Changes:
Once you've selected or uploaded a new profile picture and made any desired adjustments, look for a "Save" or "Apply" button to save the changes. Clicking this button will update your profile picture and make it visible to other Battle.net users.
8. Previewing the New Profile Picture:
To ensure your changes were applied correctly, navigate back to your profile page or refresh the page. Your new profile picture should now be displayed. Take a moment to review it and ensure it accurately represents your desired image.
9. Troubleshooting:
If you encounter any issues during the process, such as error messages or difficulties uploading an image, refer to the Battle.net support documentation. They usually provide troubleshooting steps for common problems. Alternatively, you can reach out to the Battle.net support team for personalized assistance.
10 Final Thoughts:
Changing your Battle.net profile picture is a simple but effective way to personalize your gaming experience. By following the steps outlined in this guide, you can easily update your profile picture to reflect your style and individuality. Show off your unique identity to the gaming community and make your Battle.net profile truly yours.
In this article, we've covered the step-by-step process of changing your Battle.net profile picture. By carefully following these instructions, you'll be able to select or upload a new image and customize your profile to your liking. Remember to regularly update your profile picture to keep it fresh and engaging. Enjoy the journey of personalization and make your Battle.net profile stand out from the crowd!