How to Empty the Virus Chest in Avast: A Comprehensive Guide
When it comes to protecting your computer from malware, Avast Antivirus stands as a robust and reliable option. However, sometimes it might detect infected files and quarantine them in the "Virus Chest" for further analysis and isolation. If you're wondering how to empty the Virus Chest in Avast, this guide has got you covered. In this article, we will walk you through the step-by-step process to safely remove potentially harmful files from the Virus Chest and restore your system's optimal performance.
Avast Antivirus
Section 1: Understanding Avast Virus Chest
Before delving into the removal process, let's explore what the Virus Chest is and why Avast uses it to safeguard your computer. The Virus Chest is a quarantine zone where Avast stores suspicious files isolated from the rest of your system. This containment prevents potential threats from spreading and causing harm to your computer and personal data.
Section 2: Why Empty the Virus Chest?
While the Virus Chest serves a crucial purpose in containing threats, keeping files in it indefinitely can be counterproductive. Here are some reasons why you should consider emptying the Virus Chest:
1.Free Up Disk Space:
Quarantined files consume disk space, and emptying the Virus Chest can help you regain valuable storage.
2.Avoid False Positives:
Avast may occasionally flag safe files as suspicious. Emptying the Virus Chest prevents false positives from interfering with legitimate software.
3.Streamlined Scanning:
By removing resolved threats from the Virus Chest, Avast can focus on detecting new and potential threats effectively.

Avast Antivirus
Section 3: Steps to Empty the Virus Chest in Avast
Follow these simple steps to safely clear the Virus Chest in Avast:
| Step | Action |
|---|---|
| 1. | Open Avast Antivirus: Launch the Avast application on your computer. |
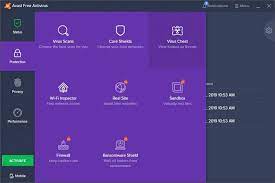
| 2. | Access "Protection" Settings: Navigate to the "Protection" tab usually located on the left-hand side of the Avast interface. |
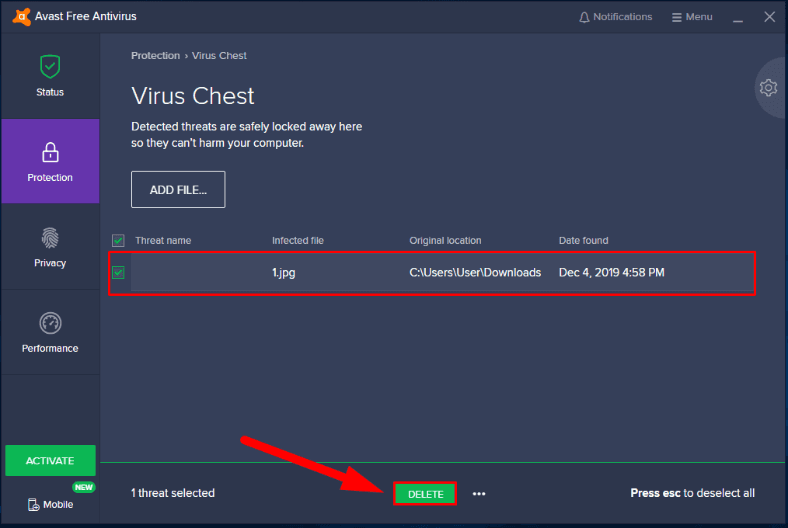
| 3. | Choose "Virus Chest": Within the "Protection" settings, select the option labeled "Virus Chest" or "Quarantine." |
| 4. | Review Quarantined Files: You will see a list of files quarantined in the Virus Chest. Take a moment to review them and ensure you want to proceed with removal. |
| 5. | Select Files for Removal: Check the boxes next to the files you wish to remove from the Virus Chest. |
| 6. | Restore or Delete: Avast offers two options - restore files to their original location or permanently delete them. Choose the appropriate action. |
| 7. | Confirmation: Avast will ask for confirmation before deleting the files. Confirm the action to proceed. |
| 8. | Restart (if required): After removing the files, Avast may prompt you to restart your computer. Do so if necessary. |
| 9. | Verification: Once your computer restarts, ensure that the Virus Chest is empty. Congratulations, you've successfully cleared it! |
Section 4: Additional Tips
Here are some extra tips to make the process even smoother:
-
Regularly Empty the Virus Chest: Make it a habit to check the Virus Chest and remove unnecessary files periodically.
-
-
Keep Avast Updated: Ensure you have the latest version of Avast installed, as updates often include improvements in threat detection and handling.
-
-
Schedule Scans: Set up regular system scans with Avast to proactively detect and isolate potential threats.
Avast Antivirus
Emptying the Virus Chest in Avast is a vital maintenance task to keep your computer running smoothly and securely. By following the step-by-step guide provided in this article, you can confidently manage the quarantine area and keep your system protected from malware threats. Remember to exercise caution when dealing with suspicious files, and always keep your antivirus software up to date for optimal protection. Stay vigilant, and your digital world will remain a safer place.