How to Remove Drawers with Metal Glides and No Levers: A Step-by-Step Guide
Removing drawers with metal glides and no levers can be a tricky task if you're not familiar with the process. This guide aims to provide you with a step-by-step approach to efficiently remove drawers without levers, making the task easier and more manageable. By following these instructions, you'll be able to safely remove drawers with metal glides, allowing for repairs, cleaning, or replacement as needed.
Section 1: Gathering the Necessary Tools
Gathering the Necessary Tools
Before starting the removal process, it's essential to gather the right tools. Here are the tools you'll need:
1. Screwdriver (flathead or Phillips, depending on the type of screws used)
2. Pliers (optional)
3. Flashlight (optional, for better visibility in dark areas)
Section 2: Assessing the Drawer and Glides
Assessing the Drawer and Glides
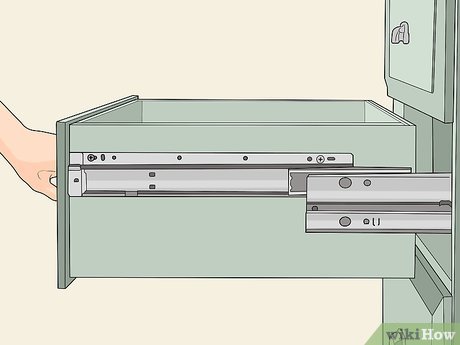
Before attempting to remove the drawer, it's important to understand its structure and how the metal glides are installed. This step will help you visualize the process and determine the best approach for removal.
Section 3: Identifying the Retention System
Drawers without levers typically have alternative retention systems in place. Here are a few common types:
1. Metal Tabs: Some drawers have metal tabs on each side that hold them in place. These tabs need to be disengaged to remove the drawer.
2. Metal Clips: Other drawers may feature metal clips that secure the drawer to the glides. These clips can be released to detach the drawer.
3. Spring Mechanisms: Spring-loaded mechanisms are sometimes used to hold drawers in place. These require specific actions to release and remove the drawer.
Section 4: Removing the Drawer
Now that you've identified the retention system used in your drawer, you can proceed with the removal process. Follow these steps:
Step 1: Empty the Drawer Before removing the drawer, empty its contents to make the process easier and prevent any accidental damage or spills.
Step 2: Assess the Retention System Inspect the drawer glides and identify the specific retention system employed. Refer to Section 3 for common types.
Step 3: Disengaging Metal Tabs If your drawer has metal tabs, use a screwdriver or pliers to carefully disengage them from the glides. Gently pull the drawer towards you to remove it once the tabs are released.
Step 4: Releasing Metal Clips For drawers with metal clips, locate the clips and use a screwdriver or pliers to release them. This should free the drawer from the glides, allowing you to pull it out.
Step 5: Dealing with Spring Mechanisms If your drawer utilizes spring mechanisms, carefully observe how they function. Look for any buttons, levers, or triggers that need to be pressed or pulled to release the drawer. Once released, gently pull the drawer out.
Section 5: Troubleshooting
In some cases, drawers may be stuck or difficult to remove. Here are a few troubleshooting tips to overcome common challenges:
1. Sticky Glides: Apply a small amount of lubricant or wax to the glides to reduce friction and make the removal process smoother.
2. Jammed Drawers: If a drawer is jammed, inspect for any obstructions or loose items that might be blocking it. Remove any objects and try again.
3. Stuck Spring Mechanisms: If a spring-loaded drawer refuses to release, carefully examine the mechanism for any signs of damage or misalignment. Gently manipulate the parts to see if they can be freed.
By following the step-by-step guide outlined above, you should now be equipped with the knowledge and tools necessary to remove drawers with metal glides and no levers. Remember to exercise caution and patience throughout the process to avoid any damage to the drawer or surrounding furniture. Once removed, you can proceed with any repairs, cleaning, or replacement needed.