Simple Moth Drawing: Step-by-Step Guide for Beginners
Drawing is a wonderful way to express your creativity and bring your imagination to life. If you're a beginner looking to draw a simple moth, you've come to the right place. In this step-by-step guide, we will walk you through the process of creating a simple and beautiful moth drawing.
How to drawing simple moth ?
1. Gather Your Materials:
Before we start, make sure you have the following materials ready:
-
Drawing paper: Choose a good-quality paper that is suitable for drawing. It should be thick enough to withstand pencil or pen strokes.
-
-
Pencil: Start with a basic pencil for sketching. You can also use an eraser to make corrections along the way.
-
-
Fine-tip markers or pens: These will be used for outlining and adding details to your drawing.
-
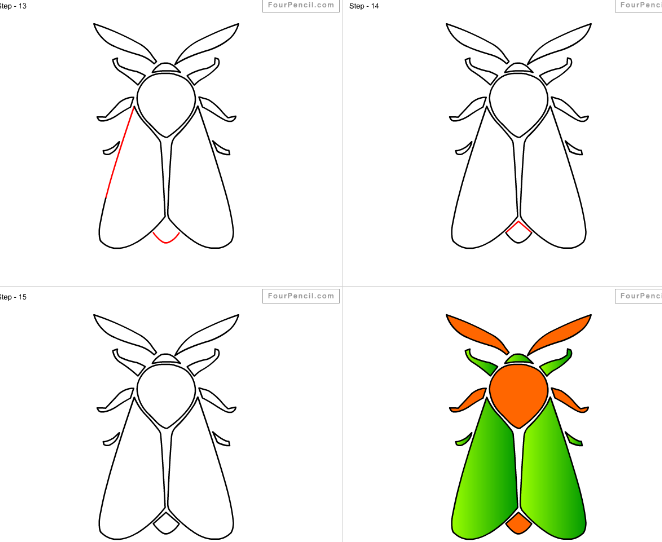
2. Sketch the Basic Shape:
Begin by lightly sketching the basic shape of the moth. Moths typically have a triangular or diamond-shaped body and two pairs of wings. Use simple geometric shapes as a guide to create the outline.
3. Add Details to the Wings:
Once you have the basic shape, focus on adding details to the wings. Moth wings are often characterized by intricate patterns and textures. Use gentle strokes to sketch the lines and curves that make up the wing design. Take your time and pay attention to the symmetry of the wings.
4. Outline the Body:
Next, outline the body of the moth. Moths have a slender and elongated body with a distinct head and abdomen. Use smooth, flowing lines to define the shape and structure of the body. Don't worry about getting it perfect on the first try; you can always make adjustments later.
5. Draw the Antennae and Legs:
Moths have long antennae and six legs. Sketch the antennae extending from the head of the moth. They can be straight or slightly curved. Then, draw the legs extending from the lower part of the body. Remember to add small segments to represent the individual sections of the legs.
6. Refine and Erase:
Take a moment to review your drawing and make any necessary refinements. Use an eraser to gently remove any unwanted lines or smudges. This will help clean up the drawing and make it more polished.
7. Add Shading and Details:
To enhance your moth drawing, you can add shading and additional details. Use your pencil to create subtle shading on the wings and body, giving them depth and dimension. You can also add tiny dots or lines to represent the scales on the wings.
8. Ink or Outline the Drawing:
Once you're satisfied with your sketch, use fine-tip markers or pens to outline the final drawing. Go over the pencil lines with confident strokes, emphasizing the contours and details. Allow the ink to dry before erasing any remaining pencil marks.
9. Color (Optional):
If you prefer, you can add color to your moth drawing using colored pencils, markers, or watercolors. Moths come in a variety of colors, so feel free to get creative and experiment with different shades.
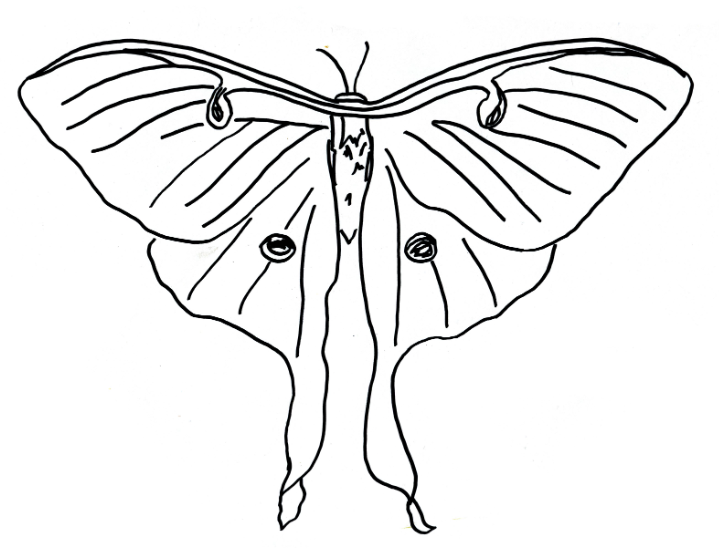
Simple moth drawing
Drawing a simple moth can be a rewarding and enjoyable experience, especially for beginners. By following these step-by-step instructions and using your imagination, you can create a beautiful moth drawing. Remember to practice, be patient, and have fun exploring your artistic skills. With time and practice, you'll be able to create even more intricate and detailed drawings.